This page it dedicated to teaching the perspective viewer how to create linked "buttons" with a rollover effect. You will need a webpage with several links, access to Dreamweaver and some time to experiment and practice.
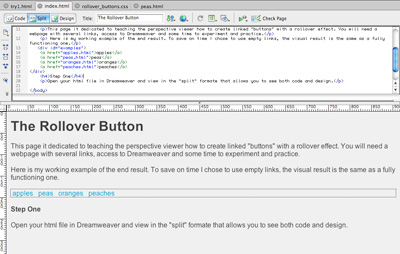
Here is my working example of the end result. To save on time I chose to use empty links, the visual result is the same as a fully functioning one.
Open your html file in Dreamweaver and view in the "split" formate that allows you to see both code and design. This will allow you to see what code you are selecting and what is happening where. It will also allow you to see where you could add inline CSS if you so desire.
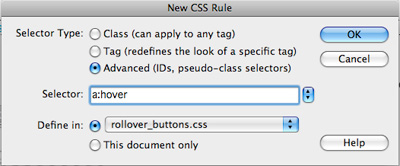
Create a new style rule, either on an exsisting css page or on a new one, by clicking on the "new css rule" icon in the CSS styles window. Select the advanced setting and choose "a:hover" as the selector. Define in should have selected your exsisting CSS page or new style sheet file depending on your previous files.
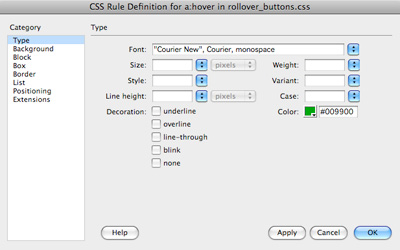
In the resulting window change the settings define the look of the rollover. For the example the only change was make to type color and font style. Here is what my window looked like.
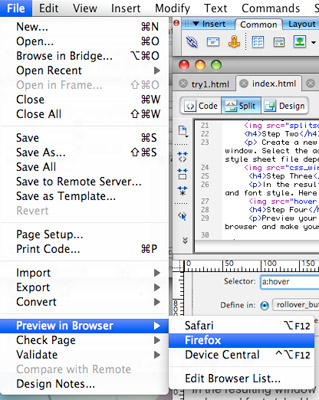
Preview your edits in a browser to see if your rollover is working the way you want it to. To do this go to file - preview in browser and make your selection.
If you like what you see save your changes. If not try again.
If you have been coding with in your html document and don't want to add a style sheet or don't have Dreamweaver you can create the same thing by writing the code in a style tag in the head. All you need to do is add an "a:hover" atribute to a style tag and then add the necessary style changes to the hovering state. Just save and preview in your own prefered method to see if you like what you have created.
I hope this tutorial has been both helpful and easy. Looking back on the finished product you realize that some things really are a lot easier than they seem. Next time you are in a jam and you simply can't remember how to do something and have been looking for hours to find your solution, remember that there are other new designers out there struggling right along with you. You are not alone.
This tutorial was created by a design student who is still learning how to write websites. If you have any comments or helpful hints that you want to send her way you can e-mail acot@cc.usu.edu.